Reverse Engineering a Maple Seed
Standing on the Shoulders of Giants
The maple seed has inspired mathematicians, physicists, and engineers for as long as the titles have existed. Without the research and the amazing tools I have access to online, it would be practically impossible for me to explore this in a home lab. I am not an aeronautical engineer or physicist, but thanks to the libraries and papers freely available I can make spinning seeds in my basement.
Basic Concepts
Goals
I originally wanted to design a printable maple seed model simply to see if it would fly. After further thought and the usual “finding problems for solutions” I realized a working model would allow me to put other seed types into the design and make spreading seeds easier. My first consideration was to use “natural” PLA without dyes or harsh additives that would break down. Later the thought of a mold with a paper pulp starch blend to scale production beyond printer time. The mold and seed spreading will be explored in future posts.
Early Learning
A samara is a winged seed that allows the plant to disperse its genes at a greater range; this simple evolutionary incentive has resulted in a wide variety of samara. While there are many interesting designs the maple is one of the more studied.
The primary paper I referenced when trying to determine how best to replicate the maple seed was “The kinematics of falling maple seeds and the initial transition to a helical motion” by Kapil Varshney, Song Chang, and Z Jane Wang.
Like most scientific papers it’s pretty jargon and greek symbol heavy. I trudged through it the best I could and came out with a few key pieces of information:
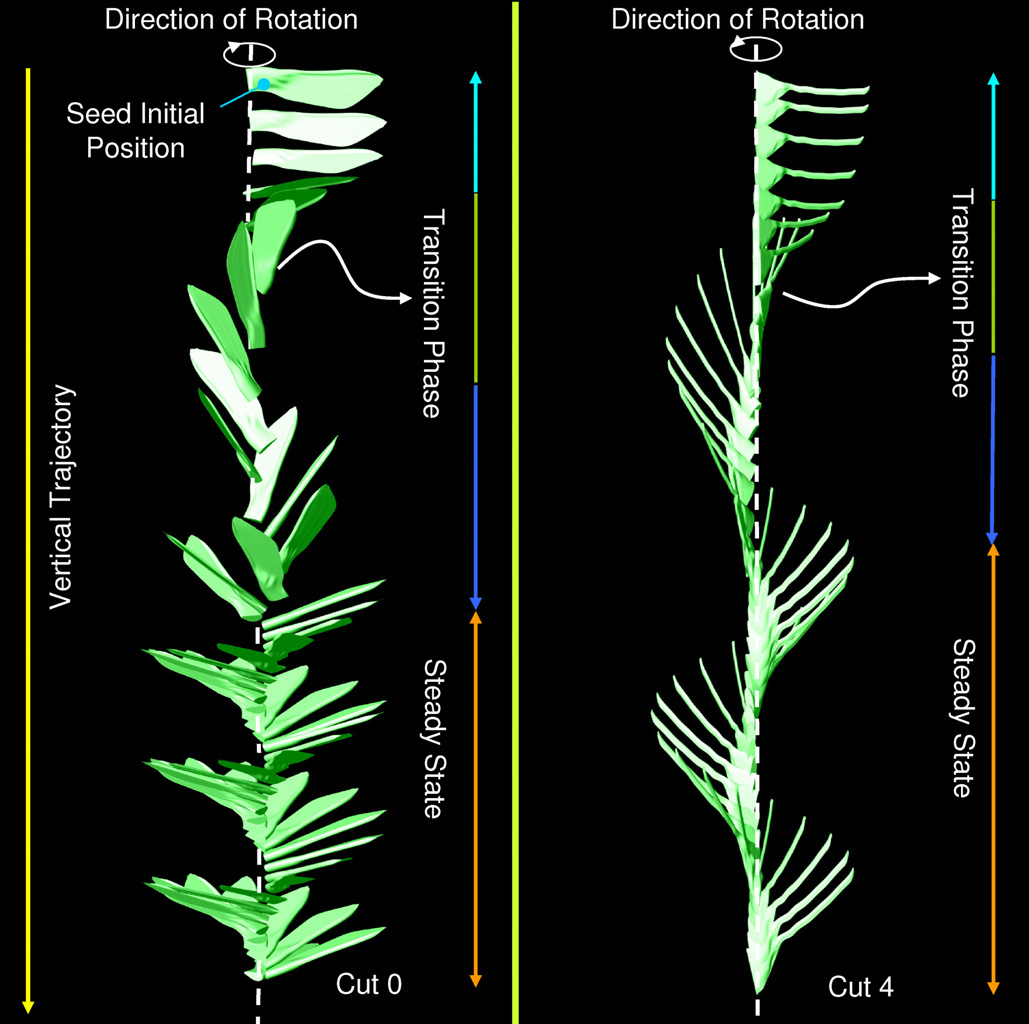
- The “tumble” at the start of descent is really important
- The center of mass and center of pressure determine its rotation and start this tumble
- The “cone angle” is mostly constant even when much of the wing is removed.(explanation of cone angle below)
This means the seed rotates based on its profile and center of mass, not the angle of the wing like paper models used in classrooms, helicopter toys, or other common demonstrations.
This was great news! We won’t have to do fancy fluid simulations or some kind of digital wind tunnel to get good results. The center of pressure will move but we can pretend it’s the center of the wing for our purposes and the center of mass can be estimated from our 3d model. We can also avoid messy issues you see when trying to print angled rotors, it can be printed flat.
Cone Angle
The cone angle is the angle the seed makes while falling when viewed from the side. This impacts many things like rotational speed and lift. Balancing cone angle and rotational speed will be significantly harder than the center of pressure and center of mass, short of experimentation its above my pay grade to determine how. It is also hard to measure without a decent camera and release mechanism. These will have to be sorted out later when we start to gather data to optimize the design.
Extra Reading
Other than kinematics I also spent some time reading on different samara and the designs inspired by them. Check out some of these links if you want to know more. Some are gated behind registration unfortunately.
- Evolution of Helicopter Seeds
- The Earliest Know Samara
- Maple Seed based Wind Turbine
- Maple Seed based Helicopter
Practical Engineering Time!
Open source first
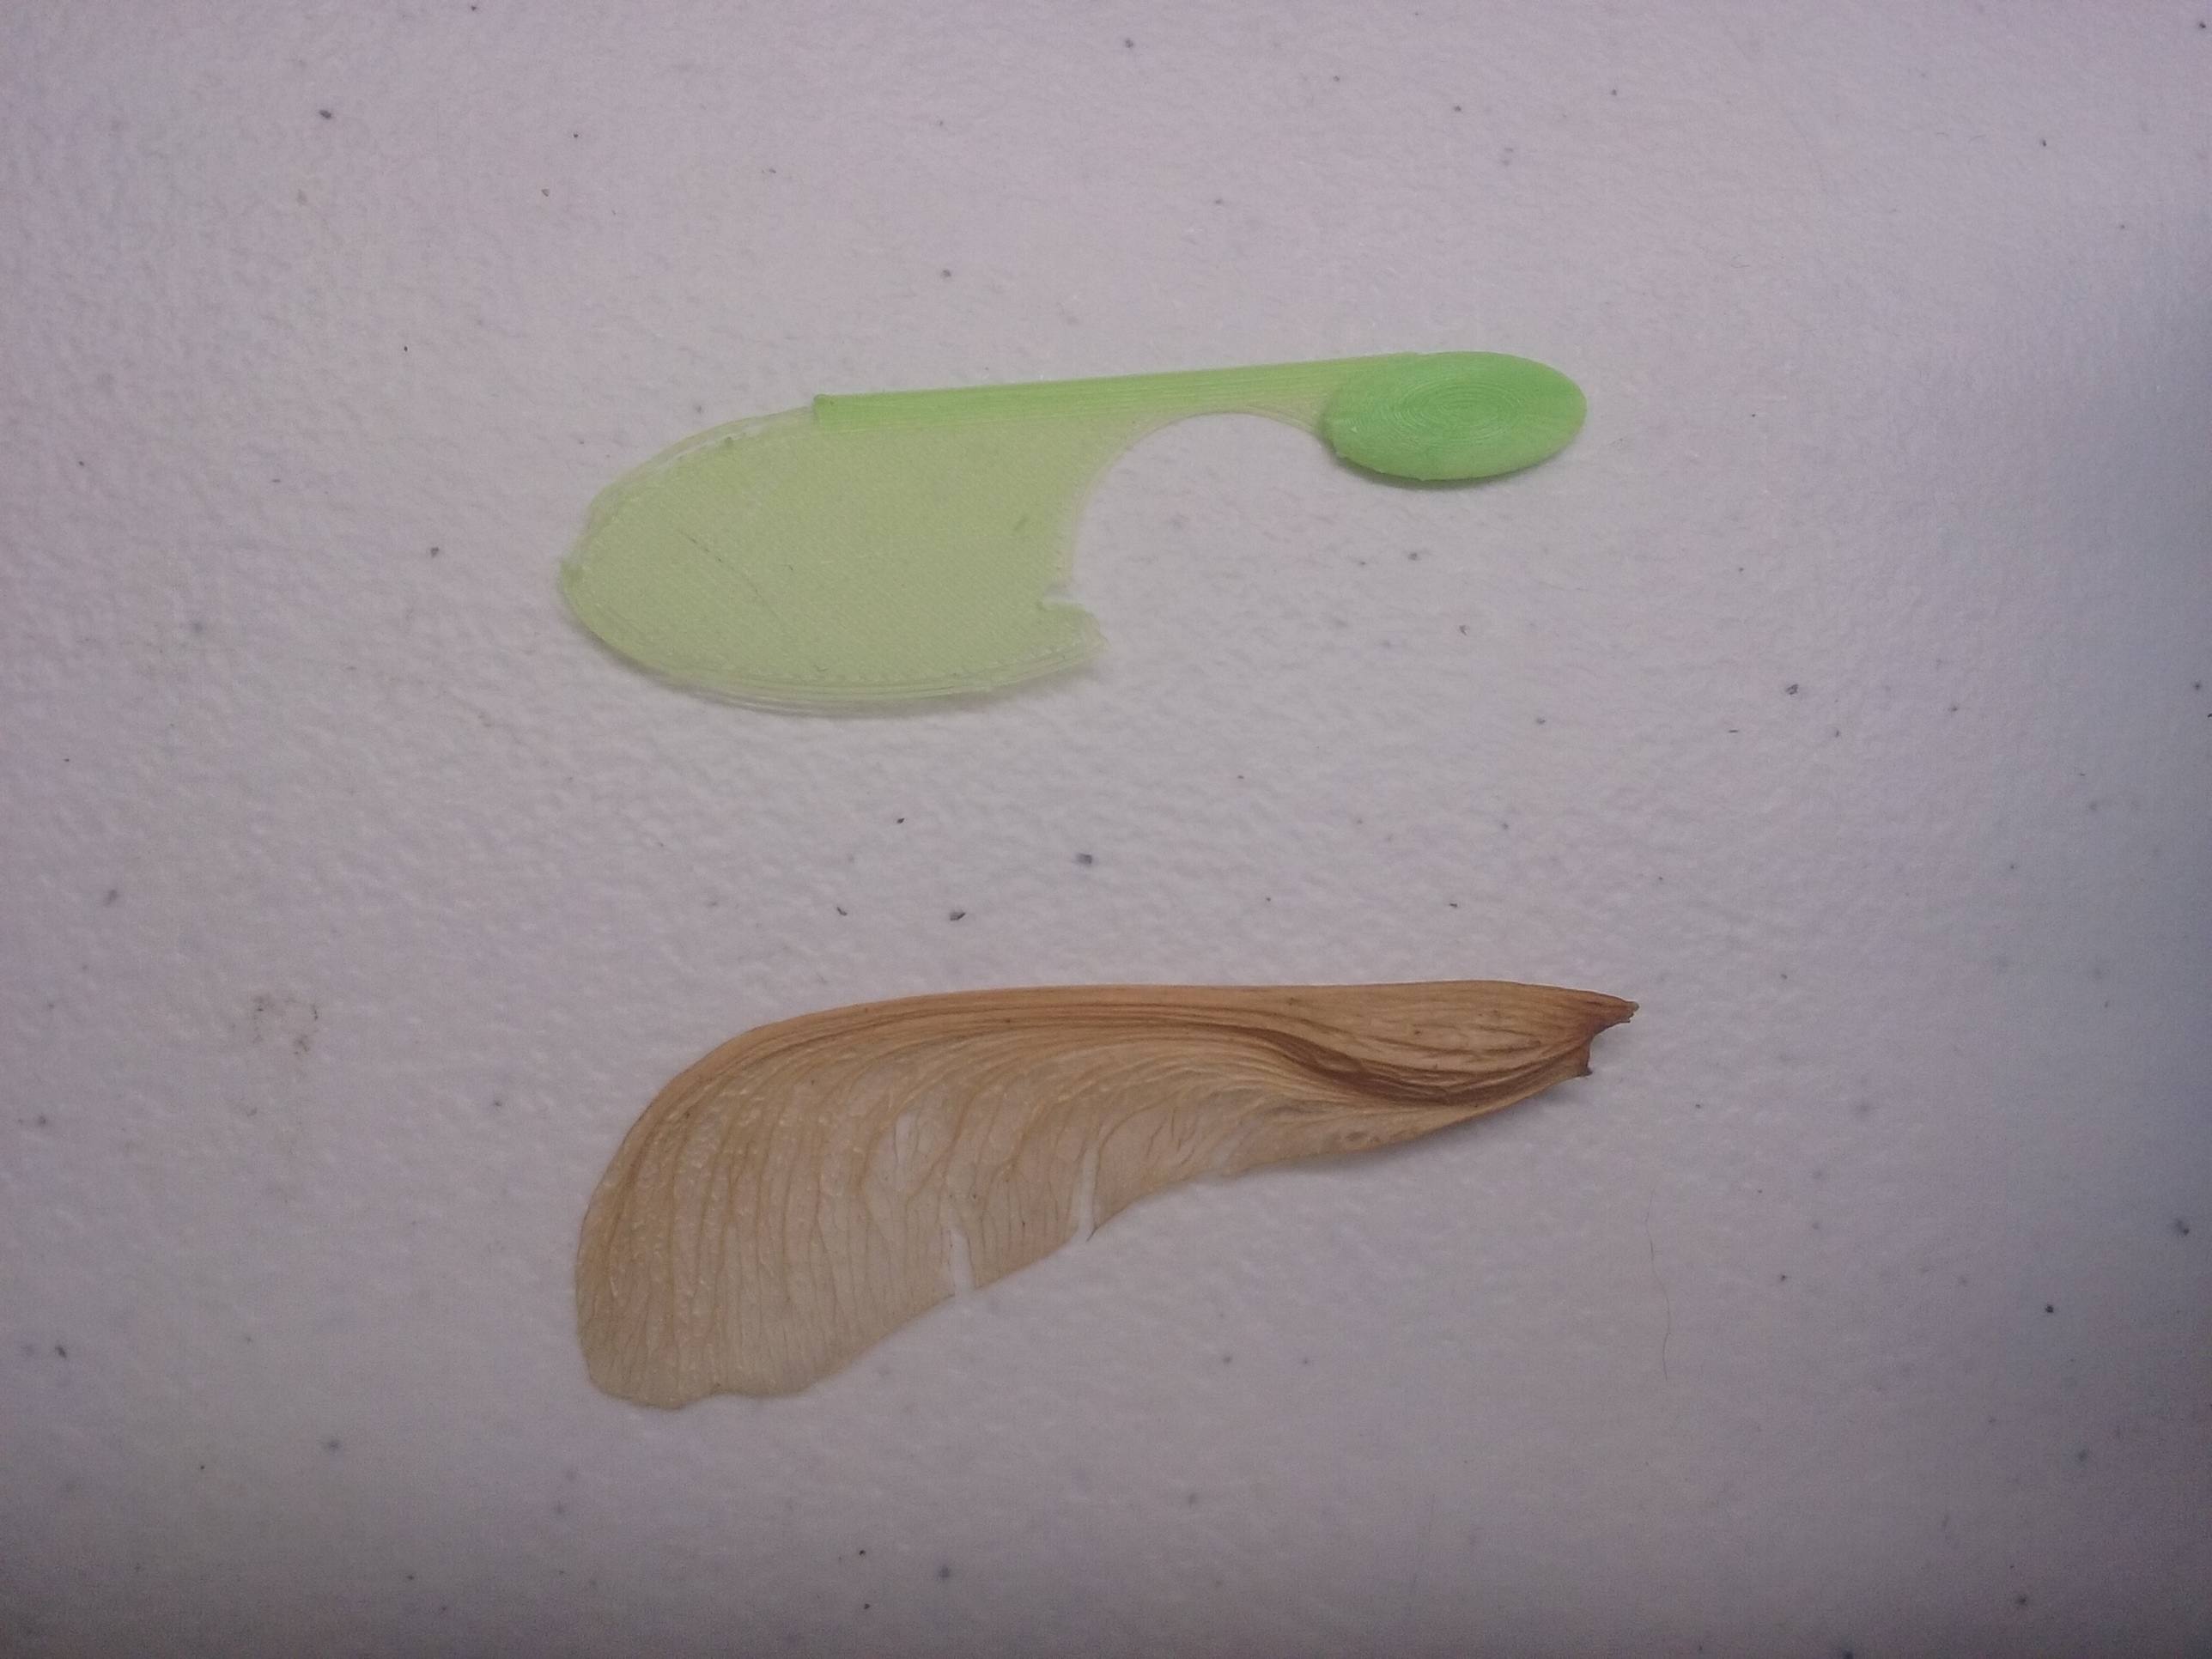
As I mentioned in the intro, I am far from the first person to examine maple seed. The first place to check is Thingiverse, while several models exist only one reported working seeds and only “50%” of the time. I printed one and messed around, it did indeed spin!
Mathematica
Wolfram Alpha is an awesome tool to bring advanced mathematics, physics, and data processing to even an uneducated hacker like myself. I have played with it a little in the past, mostly in one off functions to get information about certain objects, find derivatives for Kerbal Space Program rocket science, and other random questions.
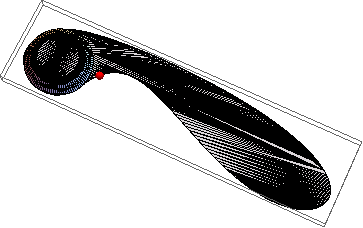
I moved into Mathematica Online to begin testing the models. I noticed the center of mass wasn’t matching my expectations and later found out the latest version of mathematica(v11) was doing something strange with the STLs. After some googling MeshLab was used for these calculations instead. We now had a method for determining our main parameter: center of mass!
The model from thingiverse was on the right track, but a couple things could be improved. The weight to surface area ratio wasn’t great and the center of mass was almost centered on the lengthwise axis which would prevent a reliable tumble.
First designs
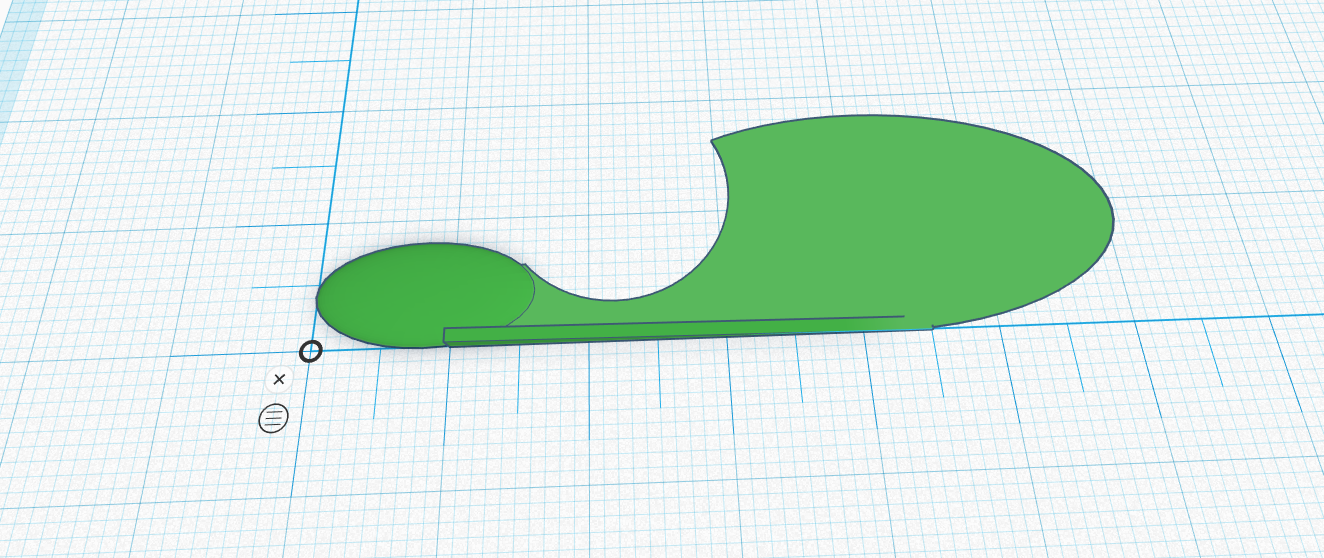
I opted to throw some simple geometry together in TinkerCAD that would let me move to OpenScad after a basic design was worked out. The wing was a an oval cylinder, the head a half sphere, a small rectangular neck to connect the two, a sloped “leaf vein” to help keep the wing rigid while shifting the center of mass, and finally a circle cut from the mid section to clean up the connection and help divide the center of mass and center of pressure.
Layer height is a really important factor on something this small. The smallest layer height I can reliably print with my CR-10 is 0.04mm. In some of my first designs I tried the wing at this height, but being a single thin layer meant they were almost all destroyed on removal from the print surface. Having 2 0.04mm layers worked much better so my design switched to 0.08mm. You can find more details on print settings at thingiverse in the “Results” section below.
Basic design elements

After joining these together we get something resembling a maple seed.
Workflow
Now the workflow was simple but slow and somewhat tedious:
- Make a change in TinkerCAD
- Export into MeshLab
- Find center of mass(Short tutorial)
- Copy this to the Mathematica notebook to bring it all together
t=Import["t34.stl", "MeshRegion"]
Graphics3D[{White, t, Green, Sphere[{-49.964504,-65.232384,0.382052}]}]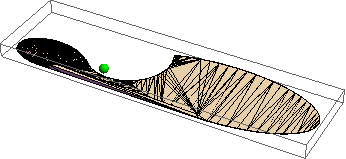
Results
After some tweaking I had models flying better than the existing one from thingiverse, and were reliably auto rotating. You can find the working models and instructions here.
Please excuse the horrible video quality, there is a reason I stick to blogging.
Science!
The next step will be moving this into OpenSCAD to parameterize the model and start quantifying things. The data dump and code will be in a future post. I have a few ideas on how things could be improved further:
- Adding struts to make the wing more rigid
- Optimizing the center of mass further
- More complex wing geometry
After that we will move into making a mold and attempting to cast these out of paper and starch, with a clay seed ball heads.
Closing thoughts
This has been an interesting project with some unexpected problems and I am very excited to continue. It’s hard for me to find good stopping points to post, hopefully having a few working models and a basic explanation will be enough for now. I would love to hear some feedback on this and see some other printed seeds, so please don’t hesitate to send me pictures or comments on twitter.
Let me know what you think of this article on twitter @BohemianHacks!
If you really liked it please consider buying me a coffee
or sending bitcoin: 1JLRwwfTiqnDVz85WkeAg4fm8A6pphNcFk