Heroku for Dinosaurs
This post is part of a series on the Todo App
Dinosaurs
Calling myself a dinosaur at 27 may seem hyperbolic(at least I hope), but it does have some truth in the world of software engineering. At this stage you have been coding long enough to form opinions, build personal workflows, and probably some favorite languages or libraries. These are all great things for a coder to have, but start to add a sort of mental inertia that make adapting to new ideas harder. As someone who has been coding throughout the growth of cloud services, it may be surprising that I am not familiar with many of them. My primary work experience is in reverse engineering, embedded development, cryptocurrency, and general computer consulting. None of these lend themselves well to high level web development, but it is never too late to learn.
“The Cloud”

Credit to Randall Munroe
I will skip the usual rant about “the cloud” and how it is actually just a series server clusters(Heroku itself uses Amazon AWS). Outside of the marketing spin, cloud services have a few common threads:
- Something as a Service
- Tools and Interfaces specific to the Platform
- Plugins or Addons to link to other services
While this list can cover many things that aren’t in the cloud, they are very common practice in various cloud services and more importantly are features of Heroku.
Basic Heroku Workflow
Derp Warning
I am still learning the ropes here, so don’t expect an expert use guide. Like most of this blog this post is simply here to chronicle my experiences with learning and share that with you. I hope this information will be useful, but equally I hope to learn more and refine this process.
Git
Luckily one of the primary tools for interacting with Heroku is something most developers know, git. I won’t spend much time discussing this other than how it is used in this case. Familiarity with git is great for hitting the ground running, but I can’t help but want some additional management features seen in things like GitLab.
Git commit size and frequency is very specific to a given team and process, and this brings me to my main issue with Heroku: a cluttered commit history. I have found 2 work arounds for this but ultimately they both leave me wanting something better. Again I am no expert here and maybe someone out there can suggest some better options.
The problem is that for many use cases you have redirection back to your site via a protected url scheme. This means that for actually testing, your code needs to be running on Heroku. All of this together results in small and frequent commits to test or correct.
The solutions I have found are:
Option 1 - Reset Git with the Heroku Repo Plugin
cd /project/
heroku plugins:install heroku-repo
heroku repo:reset
#now that the remote git is purged we pull our latest code
git pull origin master
#remove .git and reinitialize for a clean push to heroku
rm -rf .git
git init
heroku git:remote -a <appname>
This lets you clear out the cluttered git history of Heroku when you reach a stable point on your git server. When you want to do the reverse and push to your actual git server you copy everything but the Heroku .git directory over the top of the your working code base and push the changes as usual. The general idea is to just cleanly cut the git history so the Heroku git becomes more a tool for deploying than actual versioning, there are several different ways of doing so and this was my favorite.
It is a bit hacky and loses any commit history from changes pushed directly to Heroku, but for people that like cleanly encapsulated commits it can be an option.
Option 2 - Develop as much locally as possible
As of this writing this is my preferred option, but requires some extra coding. It’s good practice to have dev and production flags for building, and running a local dev build which has code to bypass the normal redirect and authorization steps keeps me from needing to push to Heroku simply for testing a small change. We will get more into the specifics of what this means in the next post of the Todo App series.
Heroku CLI
The Heroku CLI tool is a straight forward and useful tool. While the more specific commands don’t feel like something I would use in an actual terminal very often, they would be great for scripts to build and deploy.
Common commands from my use so far:
#app logs
heroku logs
#app environment variables
heroku config
#basic info like urls, addons, and git stats
heroku info
#connect to remote postgres server
heroku pg:psql
#run the app locally, some caveats here I will discuss below
heroku local
Configuration/addon commands for build and deploy scripts:
#set an environment variable from CLI
heroku config:set GITHUB_USERNAME=joesmith
#pull an environment variable from Heroku and store it for local use
heroku config:get -s GITHUB_USERNAME  >> .env
#add a postgres database to your project
heroku addons:create heroku-postgresql:hobby-dev --version=10
The “heroku local” command expects a .env file to load variables and the key to running smoothly between the local testing and deploying to Heroku is in setting these appropriately. Again, we will dive into the specifics in the next post.
Heroku Web interface
I would like to preface this section with a bit of an opinion warning. My personal tastes gravitate towards unix philosophy and CLI tools, I don’t care for IDEs or large frameworks. That being said, the web interface for Heroku is as good as can be expected. You will spend a little time learning what menus and tabs hold certain information and a bit of googling to familiarize yourself with either the web interface or the CLI.
The main areas I used were the “Resources” tab and “Settings”:
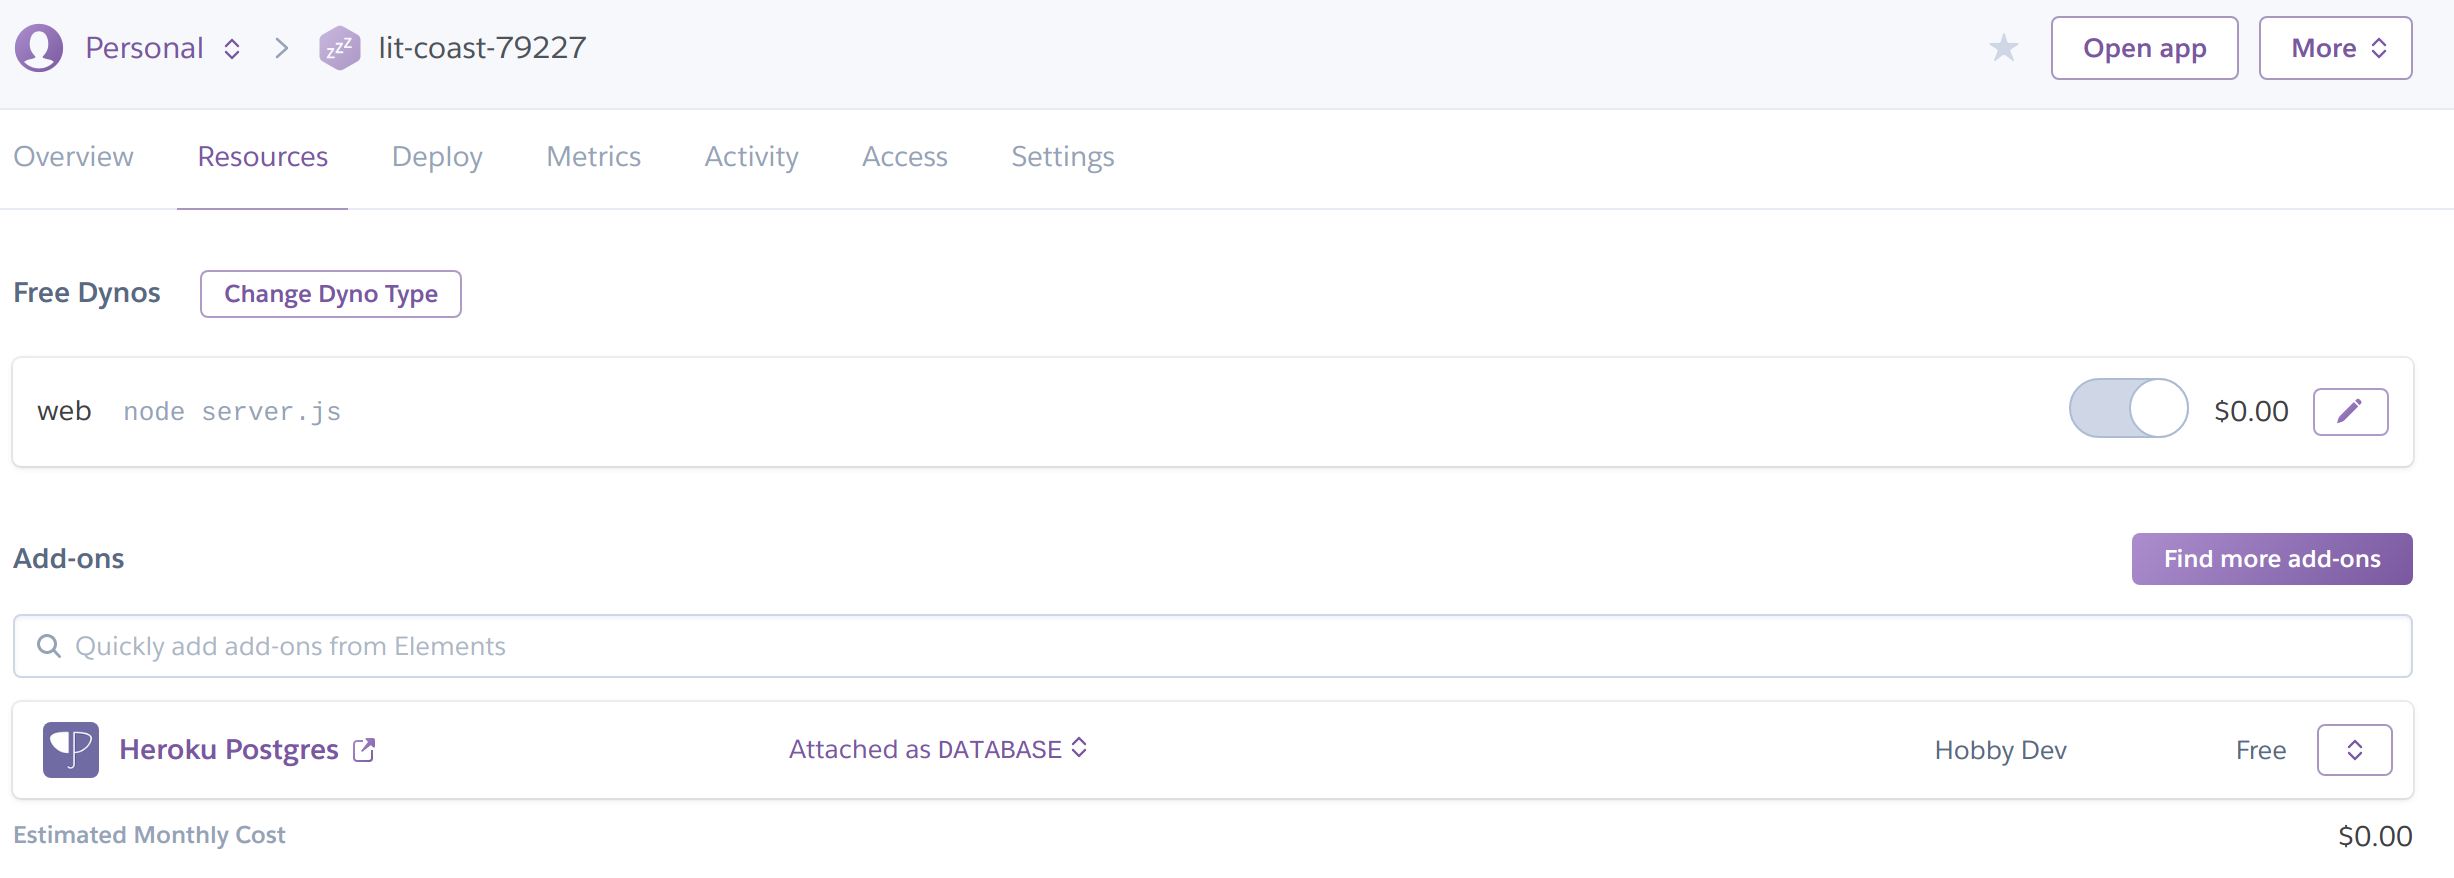 The Resources tab for addons like postgres.
The Settings tab for adding or changing environment variables.
Both of which can be done in the CLI as noted in the previous section.
Closing Thoughts
This ended up being more a review of Heroku than I intended but dinosaurs tend to gripe about things while learning. The next post in this series will be more focused on the code for the project and how it interacts specifically with the features of Heroku mentioned here. I hope it has been somewhat informative or at least an enjoyable read.
Let me know what you think of this article on twitter @BohemianHacks!
If you really liked it please consider buying me a coffee
or sending bitcoin: 1JLRwwfTiqnDVz85WkeAg4fm8A6pphNcFk